Method 1: Format USB Drive Through The Terminal
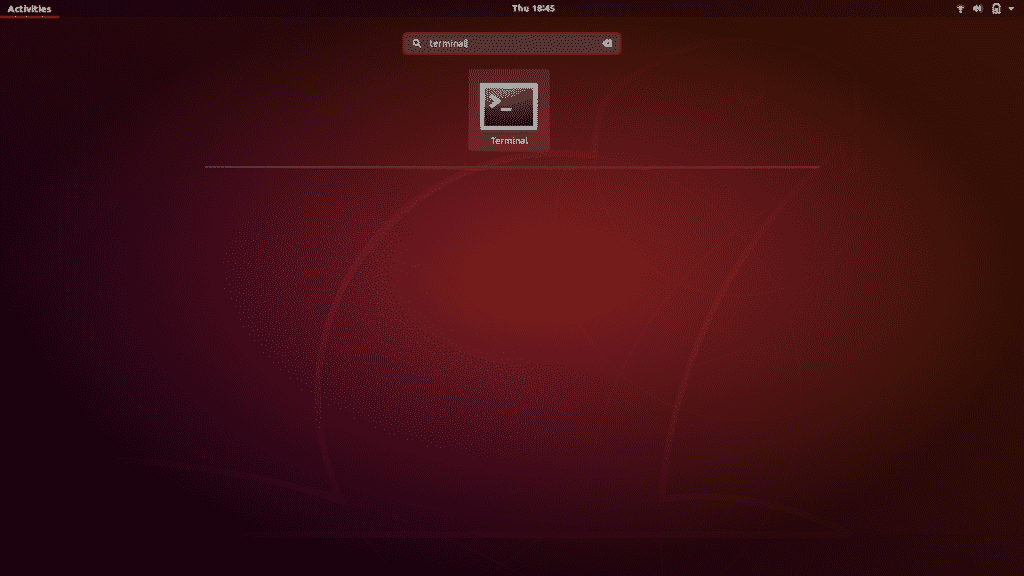
To access the terminal, you must first open the Ubuntu Dash. This is where all Ubuntu software is accessible from. Once inside the Dash (located on the bottom left corner of the screen in the form of a “Show Applications” icon, ), type “terminal” in the search bar and click on the application of the Terminal that appears.
Use the keyboard shortcut which is Ctrl+Alt+T. If you are not familiar with keyboard shortcuts, they are the shortest way of performing an operation. Simply hold these three keys together and the Terminal application will open.
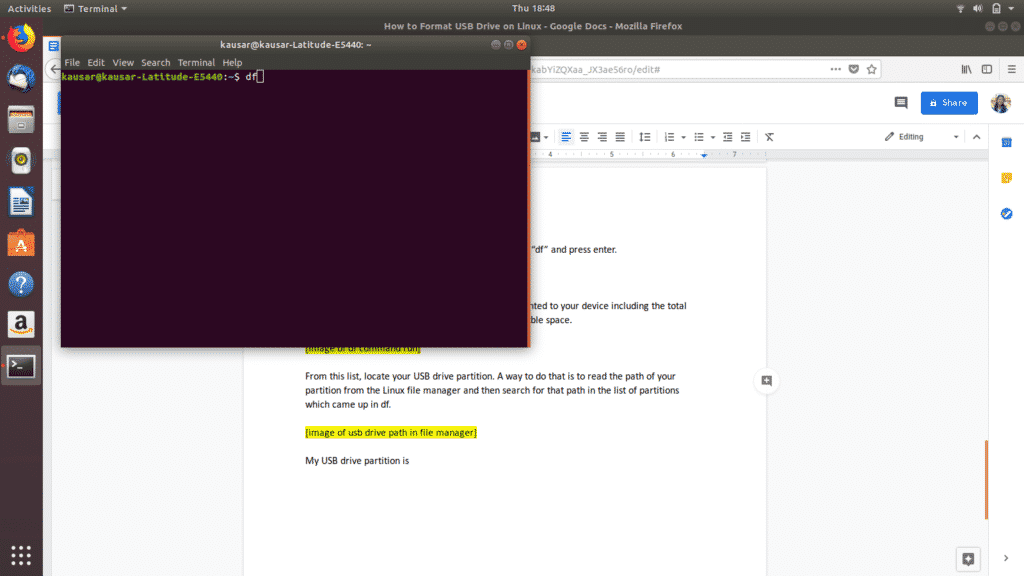
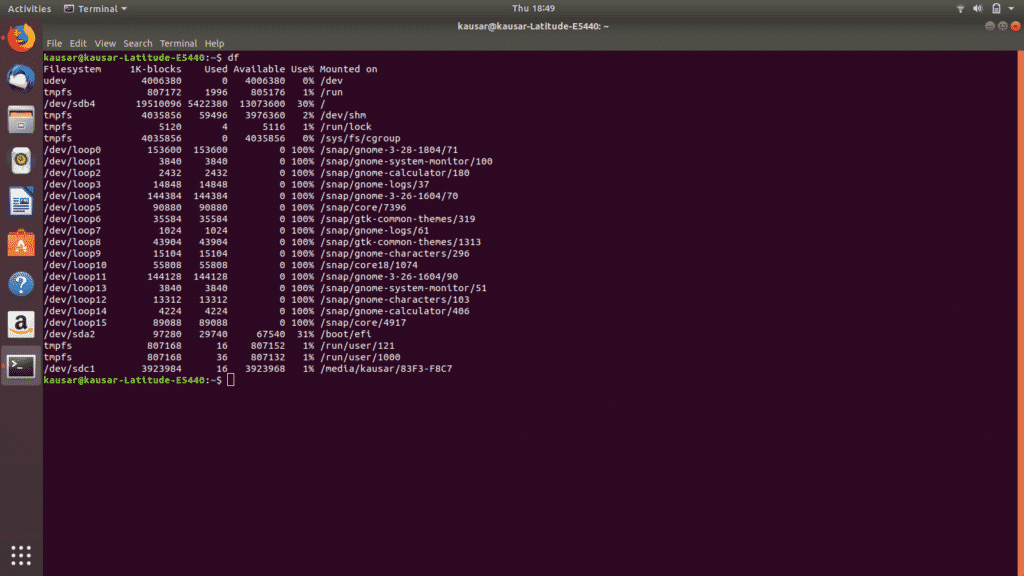
A new terminal window will open. Type the command “df” and press enter.
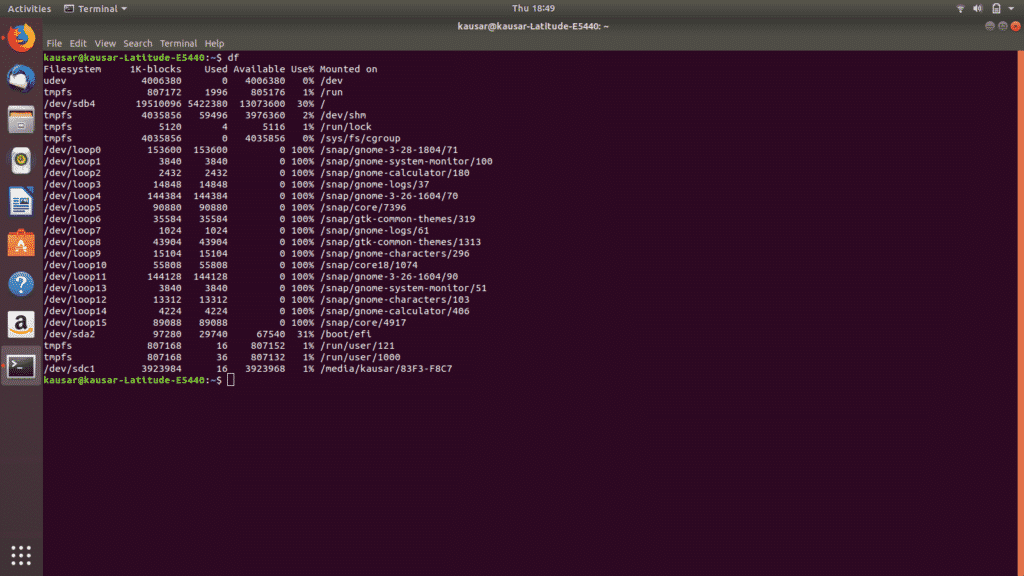
df returns a list of the details of all the partitions mounted to your device including the total space in each partition, the used space, and the available space.
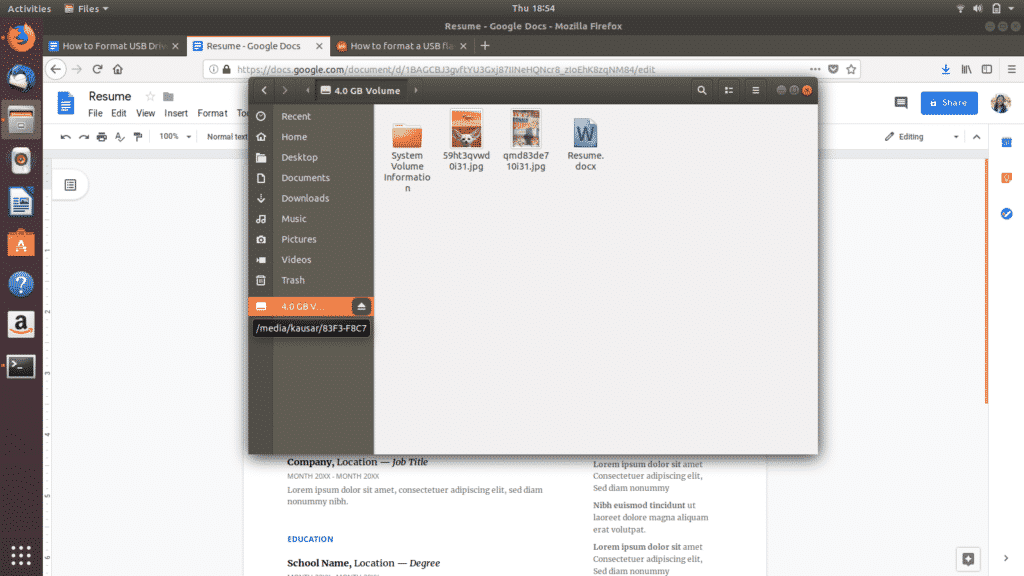
From this list, locate your USB drive partition. A way to do that is to read the path of your partition from the Linux file manager and then search for that path in the list of partitions which came up in df.
As you can see, my USB drive partition is mounted on media/kausar/83F3-F8C7 and the corresponding Filesystem name which comes up under df is /dev/sdc1.
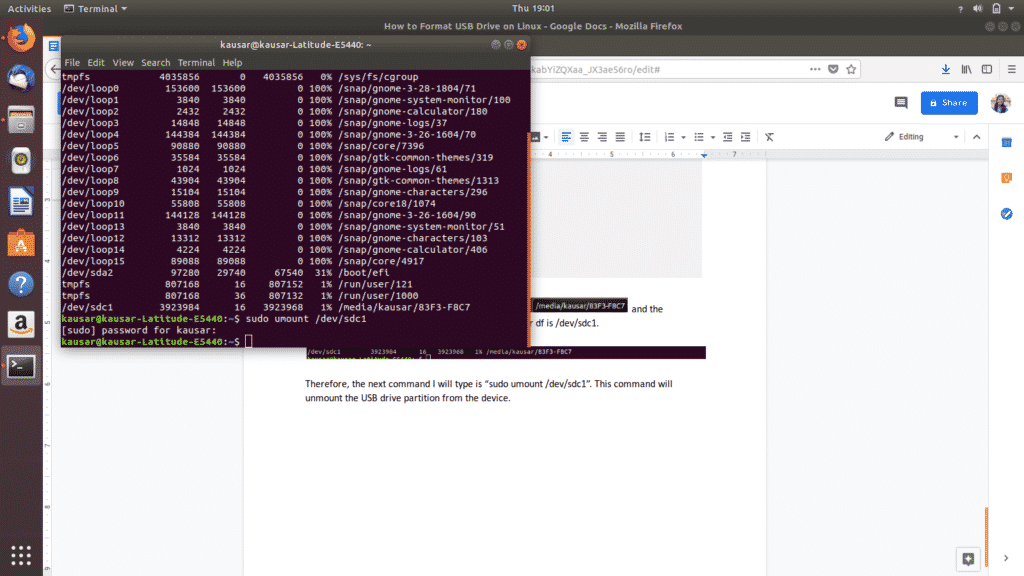
Therefore, the next command I will type is “sudo umount /dev/sdc1”. This command will unmount the USB drive partition from the device. Enter your Linux password and press enter.
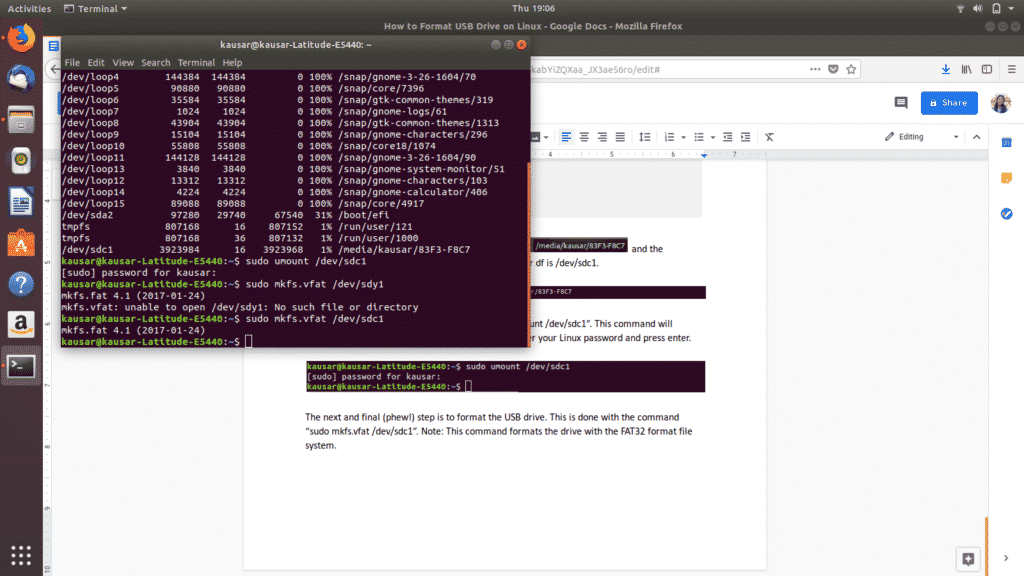
The next and final (phew!) step is to format the USB drive. This is done with the command “sudo mkfs.vfat /dev/sdc1”. Note: This command formats the drive with the FAT32 format file system.
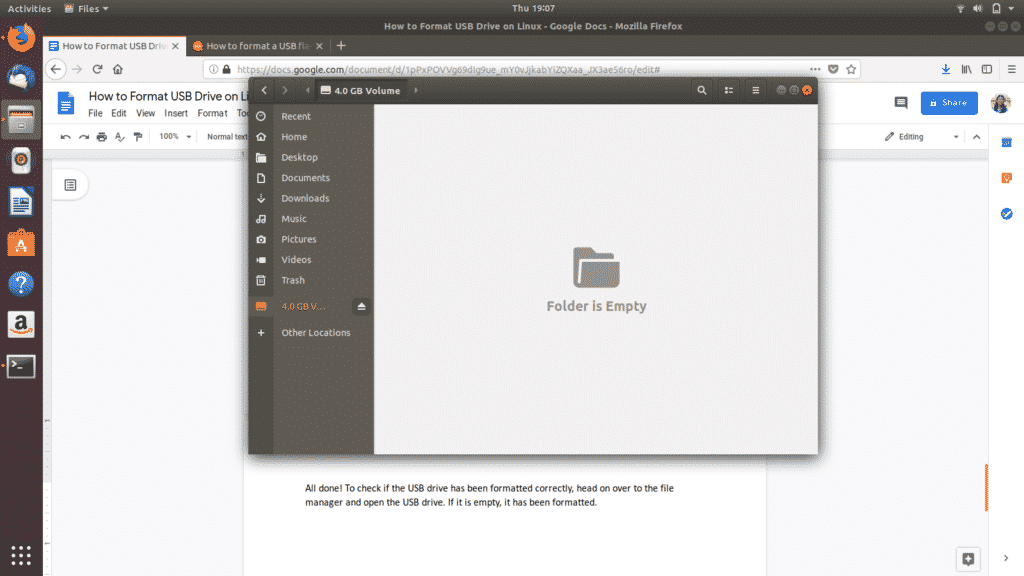
All done! To check if the USB drive has been formatted correctly, head on over to the file manager and open the USB drive. If it is empty, it has been formatted.
Method 2: Format USB Drive Through The Disks Utility
To access the Disks utility, navigate to the Dash icon (most probably located on the bottom left corner of the screen in the form of a “Show Applications” icon, , or as a Ubuntu icon). The Ubuntu Dash holds all the Ubuntu software available and installed on your device.
Type “Disks” in the resulting search bar and click on the Disks application that comes up.
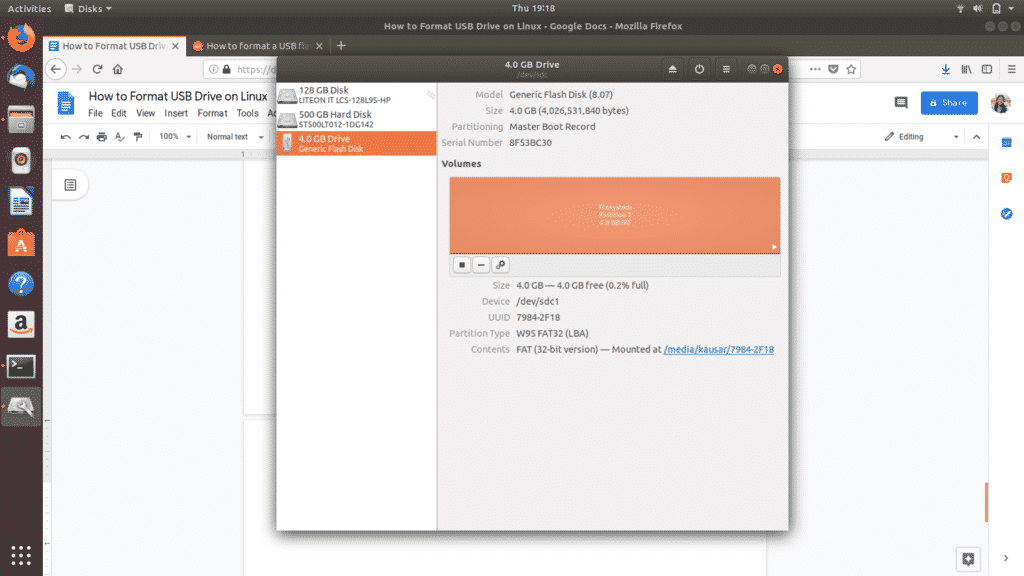
It will open up in a new window. Locate your USB drive in the list of which appear in the left panel and click on it.
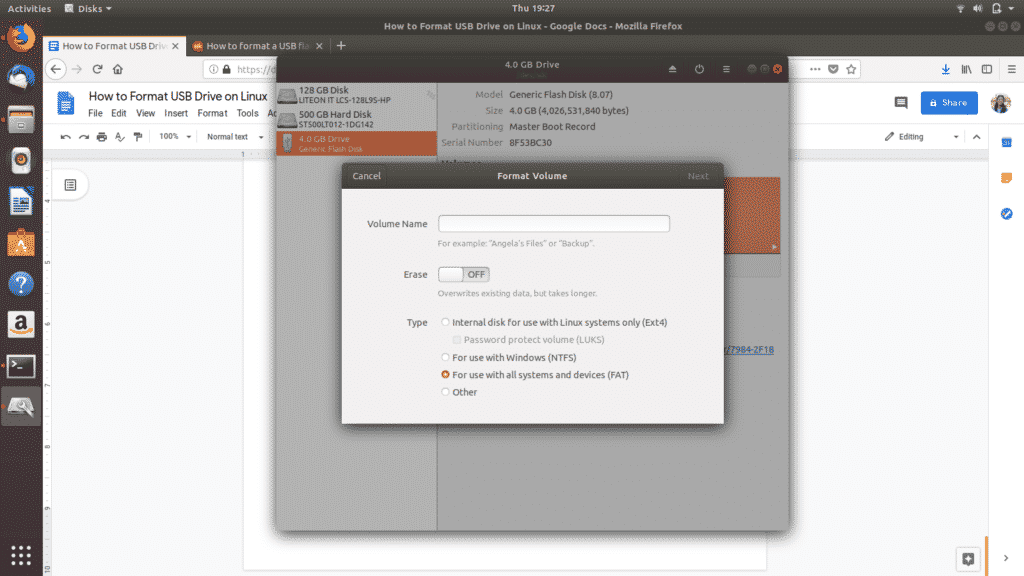
Next, under “Volumes”, of the three icons you see, click on the third gear icon, . A dropdown menu will appear. From the options displayed, click on “Format Partition”.
Set the name of your USB drive and select which type of file system format to format your USB to. Then select “Next”. A warning will pop up asking you to confirm the deletion of all your data in the USB drive. Select “Format” displayed in red on the top right corner to proceed with the formatting.
And that’s it. You’re done. These are the two easiest ways to format your USB drive and make it 100% available in space.
There are other methods of formatting a USB drive on Linux as well. For example, you can download a software called “GParted” from Ubuntu Software or the CLI. In case you experience trouble using the two methods described above, GParted offers a simple GUI to format USB drives and is an overall useful tool to have.

