GoogleFonts offers a huge library of fonts that are free to download and use. You can find the best fonts in the GoogleFonts library and directly download and install them wherever you need from their official website (https://fonts.google.com/). To install any font from Google Fonts in Ubuntu 20.04, you can directly download your desired font from their website and install it in your operating system by double-clicking on the font file.
But, when it comes to installing multiple fonts recursively, practically, it does not seem convenient to download and install every font one by one. Luckily, we have got an application available in the Ubuntu APT package repository named as TypeCatcher.
What is TypeCatcher?
Type catcher is an open-source application developed by Andrew Starr-Bochicchio for installing Google web fonts on any Linux Operating system. This application provides features like
- Previewing the font style and its size,
- Searching for font
- downloading
- Installing and uninstalling Google Fonts in Ubuntu 20.04
The best part about this application is that it allows users to download and install any font with a single click. The user does not have to install it again manually. So, without any further ado, let’s start.
Installation of TypeCatcher on Ubuntu 20.04
The application is available in the Ubuntu APT package repository and can easily be installed on Ubuntu 20.04 LTS system.
Step 1: Open up Ubuntu’s Terminal
First of all, you have to launch the terminal of Ubuntu 20.04 by using the keyboard shortcut keys (CTRL+ALT+T).
Step 2: Update the system’s APT cache repository
It is a better practice to update your system’s APT package repository before installing any application on Ubuntu. Update the system’s package repository by typing the command given below in the terminal.
After successfully updating the system’s package repository, install TypeCatcher.
Step 3: Install TypeCatcher
To install TypeCatcher on Ubuntu 20.04, type the command given below.
Once the TypeCatcher is installed on your system, it will be available in your applications menu.
Step 4: Start the TypeCatcher
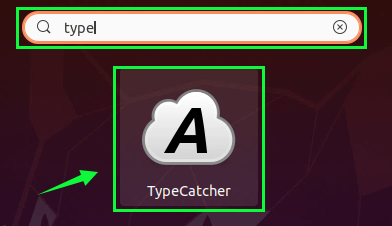
You can run and start using Type catcher on Ubuntu by searching for “TypeCatcher” in Ubuntu’s application menu and click on its icon.
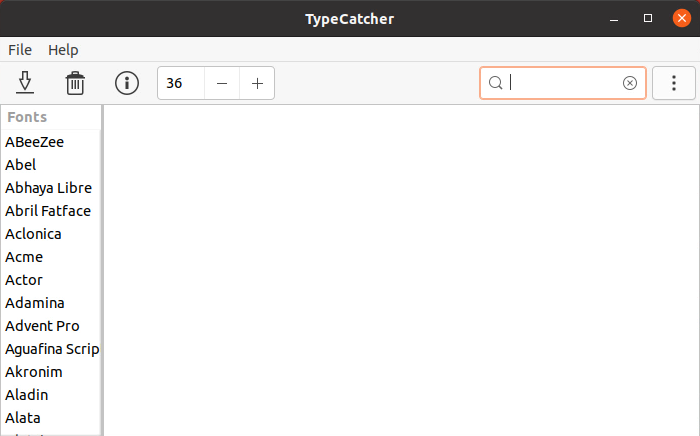
You can see that TypeCatcher is installed and running perfectly fine on Ubuntu 20.04.
Step 6: Download and install any Google Font
In this step, we will download and install the “Roboto” font in our Ubuntu system. Before downloading any font, let’s first open up the LibreOffice Writer and search for “Roboto” in the font Name field.
You can witness that it is not installed. Now, let’s install it in our Ubuntu 20.04 system, using the TypeCatcher Application.
In the type catcher application, search for the “Roboto” font in the search bar at the top right corner of the application.
Select the “Roboto” font and click on the Download font icon in the top left corner.
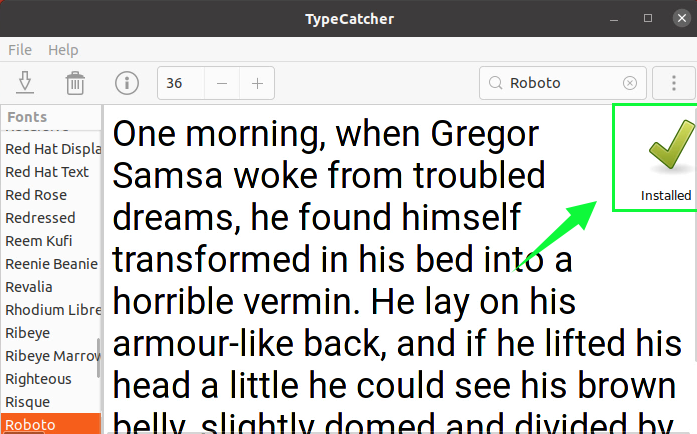
After a couple of seconds, the font will be downloaded, and an installed message will appear in the upper right corner, as shown in the picture below.
Once it is installed, let’s verify that either it is working or not.
Step 7: Verify the Font’s installation
Switch to the LibreOffice Writer and again search for the “Roboto” font.
You can see that now we got the “Roboto” font listed in the font name field of LibreOffice Writer. This is just a kind of proof that the “Roboto” font is successfully installed and working perfectly fine in the Ubuntu 20.04 LTS system.
Conclusion
This post contains the step-by-step guide on installing the TypeCatcher application on Ubuntu 20.04 and how to download and install the Google Fonts using the TypeCatcher Application on Ubuntu 20.04.


